
Crostini Bar: Create Your Own Delicious Bite-Sized Appetizers is a fun and interactive way to elevate your gatherings. Imagine a table adorned with a colorful array of toppings, inviting your guests to build their own perfect bites. This concept is not just a meal; it’s an experience that fosters social interaction and creativity. Whether you’re hosting an intimate gathering or a large party, a crostini bar pulls everyone into the fun of appetizer making, ensuring everyone leaves satisfied and happy.
The beauty of a crostini bar lies in its versatility. Guests can select from a variety of bases, spreads, and toppings to customize their mini masterpieces. From savory spreads like herbed goat cheese or creamy ricotta to fresh ingredients like roasted vegetables or cured meats, the combinations are endless. Not only does this format cater to various dietary preferences, but it also delivers a delightful treat for all taste buds.
Setting up a crostini bar is exciting and simple. With a little planning and creativity, you can delight your guests and encourage them to indulge their taste preferences. This guide will take you through the steps to create your own amazing crostini bar. You’ll learn about why this style is so appealing, what ingredients to use, and how to serve these delectable bites. Be prepared to wow your guests and fill their plates with a wonderful array of flavors!
Why You’ll Love This Recipe
A Crostini Bar makes it easy to impress your guests while allowing them the freedom to explore various flavors. Here are several reasons why this delightful concept is worth considering for your next gathering:
1. Customizable Options: Guests can mix and match toppings according to their tastes, dietary restrictions, and culinary creativity.
2. Easy Preparations: Everything can be prepared in advance, allowing you to relax and enjoy the company of your guests.
3. Interactive Experience: This style of serving encourages guests to engage with one another, fostering an atmosphere of joy and laughter.
4. Visually Stunning: A beautiful display of colorful toppings and textures creates an inviting centerpiece for your gathering.
5. Versatile Ingredients: The combinations are endless, making it suitable for any occasion—be it a casual get-together or an elegant affair.
6. Quick to Assemble: Crostini are easy and quick to assemble, meaning you won’t spend all your time in the kitchen.
With these benefits in mind, it’s no wonder that crostini bars have become a favorite for entertaining. You’ll create an inviting atmosphere that your guests will appreciate while highlighting the delicious flavors of each topping.
Preparation and Cooking Time
Creating your own Crostini Bar doesn’t require extensive cooking, and it can fit perfectly into your schedule. Here’s a breakdown of the time you’ll need to prepare and set up:
– Preparation Time: 30 minutes
– Assembly Time: 15 minutes
– Total Time: 45 minutes
These times may vary depending on the number of toppings and the size of your gathering, but this framework should provide a good estimate.
Ingredients
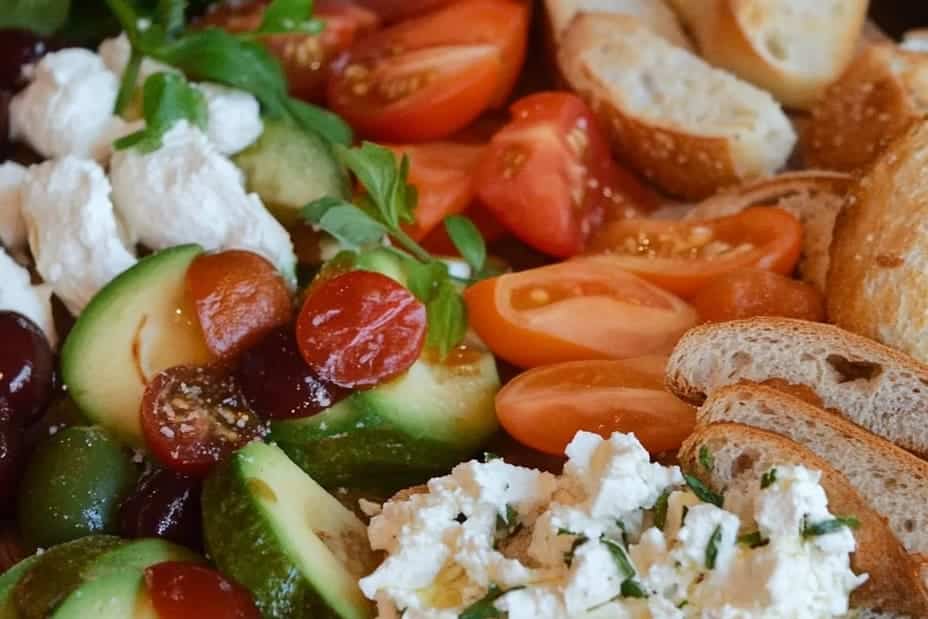
– Baguette or Italian bread (sliced)
– Olive oil (for drizzling)
– Fresh herbs (like basil or parsley)
– Creamy goat cheese
– Ricotta cheese
– Hummus (various flavors)
– Pesto
– Roasted red peppers
– Sliced tomatoes
– Cured meats (like prosciutto or salami)
– Grilled vegetables (like zucchini or eggplant)
– Blue cheese or feta cheese
– Balsamic glaze
– Honey
– Nuts (such as walnuts or pistachios)
– Seasonal fruits (like figs or pears)
This list can be expanded to cater to your guests’ preferences, ensuring everyone finds something they will enjoy.
Step-by-Step Instructions
Setting up your Crostini Bar is an effortless process. Follow these steps to ensure everything is primed and ready for your gathering:
1. Choose Your Bread: Select a high-quality baguette or Italian bread. Slice into ½-inch thick pieces.
2. Prepare the Bread: Preheat your oven to 375°F (190°C). Arrange bread slices on a baking sheet. Drizzle with olive oil and lightly sprinkle salt.
3. Toast the Bread: Bake the bread in the oven for about 8-10 minutes, or until golden and crispy. Let them cool slightly.
4. Create Spreads and Toppings: In separate bowls, place each spread (like goat cheese, hummus, and pesto).
5. Prepare Fresh Ingredients: Slice tomatoes, roast vegetables, and arrange fresh herbs in small bunches.
6. Set Up the Display: On a large platter or wooden board, arrange the toasted bread pieces.
7. Add Toppings: Set the bowls of spreads, cured meats, nuts, and fruits around the bread, making everything easily accessible.
8. Encourage Creativity: Place small spoons or spreaders in each bowl for easy serving.
Following these steps will lead to a successful and visually appealing crostini bar that your guests can’t resist!
How to Serve
Serving a Crostini Bar can be part of the entertainment itself. Here are some suggestions to enhance the experience:
1. Presentation: Use attractive platters, boards, or tiered serving trays to arrange the breads and toppings. A visual feast will entice guests.
2. Label Each Topping: Consider labeling each spread or topping. This helps guests know their options and can also be useful for those with dietary restrictions.
3. Provide Utensils: Ensure there are enough spreaders or small forks available for guests to use while assembling their crostini.
4. Encourage Experimentation: Remind your guests to try different combinations. The fun is in the creativity!
5. Drink Pairings: Pair your crostini with a selection of wines or light cocktails to complement the flavors and enhance the experience.
6. Contemplate Portions: Encourage small servings, allowing guests to try multiple combinations without overindulging.
By following these serving tips, you’ll create a memorable experience that highlights the enjoyable elements of the crostini bar. Each combination will tantalize the taste buds, making your gathering a hit!
In conclusion, a Crostini Bar: Create Your Own Amazing Ultimate Bite-Sized Appetizers is not only an innovative way to serve food but also an engaging social experience. The combination of flavors, textures, and colors will leave a lasting impression on your guests. So gather your ingredients, align your toppings, and prepare for an incredible time of creativity and connection! Enjoy every delicious bite!
Additional Tips
– Experiment with Toppings: Encourage your guests to explore unconventional combinations. Mixing flavors can lead to delightful surprises.
– Balance Flavors: Offer a mix of spicy, sweet, and savory toppings to satisfy all palates. This balance enhances the overall experience.
– Consider Dietary Restrictions: Provide at least a few vegetarian, vegan, and gluten-free options to ensure everyone can indulge without worry.
– Make Ahead of Time: Prepare the spreads and toppings ahead of time for a smoother hosting experience. This will allow you to spend more time with your guests.
– Stay Seasonal: Use seasonal ingredients to inspire your menu. Fresh, in-season produce will enhance flavors and appeal visually.
Recipe Variation
Feel free to get creative with your crostini bar! Here are some variations to inspire you:
1. Mediterranean Twist: Incorporate toppings like tapenade, roasted garlic, and feta cheese for a Mediterranean flair.
2. Sweet Tooth Special: Create a dessert crostini option using cream cheese frosting, fresh berries, and a drizzle of honey.
3. Global Influence: Add elements from different cuisines, such as chimichurri and chorizo for a South American vibe or hummus with olives and za’atar for a Middle Eastern touch.
4. Taste of Fall: Feature toppings like spiced pumpkin puree, caramelized apples, and sage for an autumn-inspired crostini.
Freezing and Storage
– Storage: Store any leftover toppings in airtight containers in the refrigerator. Most spreads and toppings will last for 3-5 days.
– Freezing: While crostini themselves do not freeze well, you can freeze spreads like hummus or pesto for later use. Ensure they are well-sealed to avoid freezer burn.
Special Equipment
You will need a few basic tools to create your crostini bar successfully:
– Baking Sheet: For toasting your bread to perfection.
– Mixing Bowls: For preparing and serving spreads smoothly.
– Knife: For slicing cheese, fruits, and vegetables.
– Small Serving Spoons: To help guests easily scoop spreads and toppings.
– Platter or Serving Board: A stylish display for presenting your delicious creations.
Frequently Asked Questions
What type of bread works best for crostini?
Baguette or Italian bread is ideal because it holds up well under toppings and toasts nicely.
Can I make the spreads in advance?
Absolutely! Many spreads can be made up to two days ahead of time. Just store them in the fridge until ready to serve.
How many toppings should I provide?
Aim for at least five different spreads and a variety of toppings to ensure that everyone can find something they enjoy.
What can I do with leftover crostini?
Use leftover crostini to top soups, salads, or enjoy them as a crunchy snack with dips.
Can I have a crostini bar for breakfast or brunch?
Definitely! You can create breakfast-inspired options using avocado, smoked salmon, or sweet spreads like fruit preserves and cream cheese.
Conclusion
A Crostini Bar: Create Your Own Delicious Bite-Sized Appetizers is more than just a culinary trend—it’s an experience that promotes creativity and interaction among your guests. With a little planning and the right ingredients, you can create a stunning display that leaves everyone inspired and satisfied. Each bite allows your guests to explore their tastes, making your gathering a memorable one. So gather your ingredients, set up that beautiful spread, and watch your guests delight in their culinary creations!
Crostini Bar: Create Your Own Amazing Ultimate Bite-Sized Appetizers

- Prep Time: 15 minutes
- Cook Time: 10 minutes
- Total Time: 25 minutes
Ingredients
– Baguette or Italian bread (sliced)
– Olive oil (for drizzling)
– Fresh herbs (like basil or parsley)
– Creamy goat cheese
– Ricotta cheese
– Hummus (various flavors)
– Pesto
– Roasted red peppers
– Sliced tomatoes
– Cured meats (like prosciutto or salami)
– Grilled vegetables (like zucchini or eggplant)
– Blue cheese or feta cheese
– Balsamic glaze
– Honey
– Nuts (such as walnuts or pistachios)
– Seasonal fruits (like figs or pears)
This list can be expanded to cater to your guests’ preferences, ensuring everyone finds something they will enjoy.
Instructions
Setting up your Crostini Bar is an effortless process. Follow these steps to ensure everything is primed and ready for your gathering:
1. Choose Your Bread: Select a high-quality baguette or Italian bread. Slice into ½-inch thick pieces.
2. Prepare the Bread: Preheat your oven to 375°F (190°C). Arrange bread slices on a baking sheet. Drizzle with olive oil and lightly sprinkle salt.
3. Toast the Bread: Bake the bread in the oven for about 8-10 minutes, or until golden and crispy. Let them cool slightly.
4. Create Spreads and Toppings: In separate bowls, place each spread (like goat cheese, hummus, and pesto).
5. Prepare Fresh Ingredients: Slice tomatoes, roast vegetables, and arrange fresh herbs in small bunches.
6. Set Up the Display: On a large platter or wooden board, arrange the toasted bread pieces.
7. Add Toppings: Set the bowls of spreads, cured meats, nuts, and fruits around the bread, making everything easily accessible.
8. Encourage Creativity: Place small spoons or spreaders in each bowl for easy serving.
Following these steps will lead to a successful and visually appealing crostini bar that your guests can’t resist!
Nutrition
- Serving Size: 10
- Calories: 250 kcal
- Fat: 12g
- Protein: 5g