
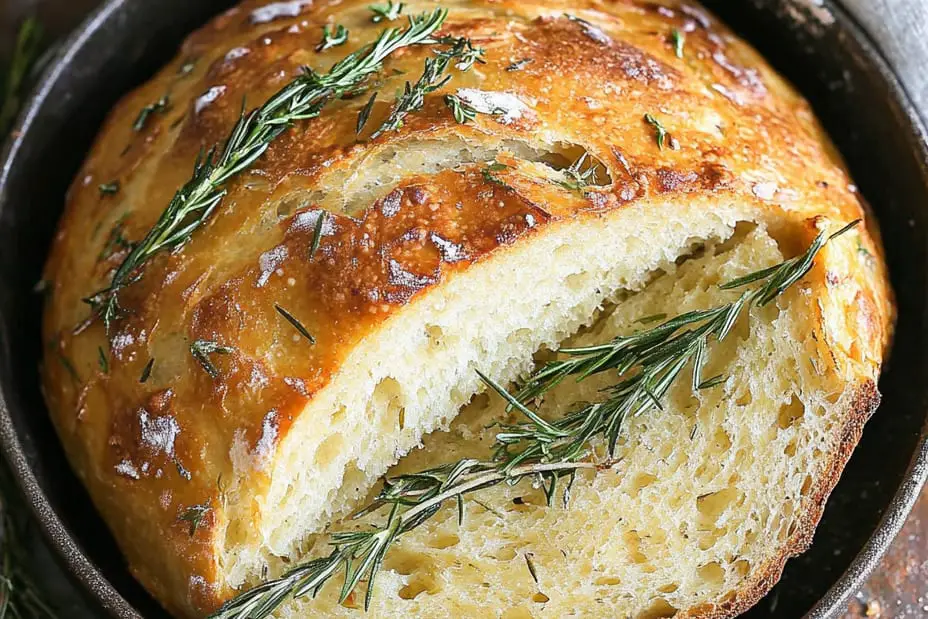
No Knead Rosemary Bread is a delightful way to create artisan quality bread right in your own kitchen without the added effort of kneading. This incredibly simple recipe offers an aromatic touch that transforms your home into a bakery with minimal work. Imagine the incredible smell of fresh rosemary mingling with warm, crusty bread. It’s not just about the taste; it’s about the unforgettable experience of baking bread that feels special yet achievable.
If you’ve ever hesitated to try homemade bread due to the complicated techniques involved, this No Knead Rosemary Bread will change your mind. The blend of flour, water, rosemary, and a bit of salt comes together effortlessly to produce a loaf that is perfect for sandwiches, toasts, or simply enjoyed on its own. With just a handful of ingredients and a little patience, you’ll soon be savoring the satisfying crunch of crust paired with that soft, fluffy interior.
In this article, you’ll discover why this No Knead Rosemary Bread recipe stands out, the straightforward preparation steps, and how to serve it for optimal enjoyment. Let’s dive in and explore the world of artisan baking, making it easier than ever for anyone to create this wonderful bread from the comfort of their home.
Why You’ll Love This Recipe
No Knead Rosemary Bread brings together simplicity and satisfaction in ways that make it highly appealing. Here are just a few reasons why this recipe will win your heart:
1. Effortless Preparation: There’s no need for a stand mixer or kneading by hand. Just mix ingredients and let time work its magic.
2. Aromatic Flavor: The infusion of fresh rosemary gives this bread an incredible aroma and flavor that elevates any meal.
3. Perfect Texture: Despite its easy preparation, you’ll achieve a crusty exterior and soft, airy inside that rival bakery bread.
4. Versatile Usage: This bread works beautifully as a side dish, a base for bruschetta, or even as an elegant sandwich bread.
5. Minimal Ingredients: Using just four main ingredients, you can make this artisan bread without breaking the bank or spending hours in the kitchen.
6. Impressive Presentation: The rustic appearance of this loaf makes it a showstopper for gatherings and family meals.
Each bite of No Knead Rosemary Bread will delight your senses, providing a comforting experience that might just make it a regular in your kitchen.
Preparation and Cooking Time
Creating No Knead Rosemary Bread takes a little time, but most of it is passive, allowing for an easy baking experience. Here’s a breakdown of the time required for making this delicious bread:
– Preparation Time: 15 minutes
– Resting Time: 12 to 18 hours (overnight for best results)
– Baking Time: 30-35 minutes
– Cooling Time: 30 minutes
With just a little planning, you can easily incorporate this bread into your routine or for a special occasion.
Ingredients
– 3 cups all-purpose flour
– 1 ½ cups warm water (about 110°F/43°C)
– 1 teaspoon salt
– 1 teaspoon instant yeast
– 2 tablespoons fresh rosemary, chopped (or 2 teaspoons dried)
– Cornmeal or additional flour for dusting
Step-by-Step Instructions
Making No Knead Rosemary Bread is a straightforward process. Follow these steps to achieve your aromatic masterpiece:
1. Combine Dry Ingredients: In a large mixing bowl, whisk together the flour, salt, yeast, and chopped rosemary until evenly mixed.
2. Add Water: Gradually pour in the warm water while stirring with a wooden spoon or spatula until a shaggy dough forms.
3. Mix Thoroughly: Ensure that all flour is incorporated into the mixture. The dough should be wet and sticky.
4. Cover the Bowl: Loosely cover the bowl with plastic wrap or a clean kitchen towel and let it rest for 12 to 18 hours at room temperature. Overnight is best.
5. Preheat the Oven: About 30 minutes before you plan to bake, preheat your oven to 450°F (230°C). Place a Dutch oven (with the lid) inside to heat up as well.
6. Shape the Dough: When your dough is ready, turn it out onto a well-floured surface. With floured hands, gently shape it into a round loaf without kneading, and let it rest on a floured surface for about 30 minutes.
7. Prepare for Baking: Carefully remove the preheated Dutch oven from the oven and sprinkle the bottom with cornmeal or additional flour to prevent sticking.
8. Transfer the Dough: Place the dough into the hot pot (it’s okay if it’s not perfectly shaped) and cover with the lid.
9. Bake: Bake covered for 30 minutes, then remove the lid and bake for an additional 10-15 minutes or until the crust is golden brown.
10. Cool: Carefully remove the bread from the pot and let it cool on a wire rack for at least 30 minutes before slicing.
Enjoy the amazing aroma wafting through your kitchen as your bread cools!
How to Serve
No Knead Rosemary Bread can be enjoyed in various ways, enhancing your meals with its delightful flavors. Here are some ideas on how to serve this beautiful bread:
1. As a Side Dish: Complement soups, stews, or salads with warm slices of rosemary bread to round out your meal.
2. With Dips: Serve it alongside olive oil and balsamic vinegar, or a flavorful tapenade for a delicious appetizer.
3. For Sandwiches: Use it as the base for hearty sandwiches filled with meats, cheeses, and vegetables.
4. Bruschetta Base: Toast slices of the bread lightly and top with tomatoes, basil, and mozzarella for a fresh bruschetta.
5. With Cheese and Charcuterie: Pair your bread with artisan cheeses and cured meats for a delightful charcuterie board.
A thoughtful presentation can add to the experience. Consider garnishing with fresh rosemary or olive oil in a dish for dipping. No matter how you choose to serve it, No Knead Rosemary Bread will undoubtedly impress everyone at your table!
Additional Tips
– Use Fresh Rosemary: For the best flavor, opt for fresh rosemary when possible. Dried rosemary can work in a pinch but may not provide the same aromatic quality.
– Hydrate the Dough: Ensure the water is warm, about 110°F (43°C), to activate the yeast. This helps create the bubbly texture in your bread.
– Experiment with Flavors: Consider adding other herbs or spices like thyme or garlic for a unique twist on the basic recipe.
– Use a Digital Scale: For accurate measurements, especially with flour, consider using a kitchen scale for the best results.
– Allow for Longer Rising Time: If your home is cooler, the dough might need additional rising time. Trust your instincts and let it rise until doubled in size.
Recipe Variation
Feel free to make this recipe your own! Here are some variations to try:
1. Cheese Infusion: Add shredded cheese, such as Parmesan or mozzarella, into the dough for a cheesy flavor throughout.
2. Olive Addition: Mix in chopped olives for a Mediterranean touch. They add a nice brininess to the flavor profile.
3. Different Herbs: Experiment with other herbs such as oregano, thyme, or basil for interesting flavor combinations.
4. Sun-Dried Tomatoes: Incorporate chopped sun-dried tomatoes into the dough to create a flavorful bread that pairs well with Italian dishes.
5. Gluten-Free Version: Substitute the all-purpose flour with gluten-free flour blends designed for bread. Be sure to check the rising properties for the best results.
Freezing and Storage
– Storage: Keep the bread wrapped in plastic wrap or stored in a sealed bag at room temperature for up to 3 days. This will help maintain freshness.
– Freezing: You can freeze sliced bread for up to 3 months. Wrap each slice individually in plastic wrap, and place them in a freezer bag. To thaw, simply leave them at room temperature or warm in the oven.
Special Equipment
Here are a few tools that will make preparing No Knead Rosemary Bread easier:
– Mixing Bowl: A large bowl for mixing and rising the dough is essential.
– Wooden Spoon or Spatula: For combining the ingredients easily without disturbing the dough too much.
– Dutch Oven: This is crucial for creating that perfect crust. A heavy pot traps steam during baking, mimicking a professional steam oven.
– Cooling Rack: Allow your bread to cool properly, ensuring that the crust remains crispy.
Frequently Asked Questions
Can I use all-purpose gluten-free flour?
Yes, but you may need to adjust the liquids and rising times based on the flour blend you choose.
What should I do if my dough doesn’t rise?
Warmth is key! Make sure that the dough is kept in a warm area, and double-check the expiration date of your yeast.
Can I make this bread without rosemary?
Absolutely! Feel free to leave it out or substitute with different herbs or spices that you enjoy.
What should I do if my bread is too dense?
This can occur if the dough hasn’t risen long enough. Ensure that it is properly rested and has doubled in size for the best texture.
How do I know when my bread is done baking?
The bread should be golden brown on top and sound hollow when tapped on the bottom.
Conclusion
No Knead Rosemary Bread is more than just a recipe; it’s a journey into the world of simple, yet delicious artisan baking. Its delightful aroma, minimal effort, and versatile use will have you baking time and again. Whether enjoyed fresh from the oven or as part of a gourmet meal, this bread is bound to impress. With a few easy variations and tips, you’ll find ways to make this bread your own, transforming it into a staple of your kitchen repertoire.
No Knead Rosemary Bread: An Amazing Ultimate Recipe
- Prep Time: 15 minutes
- Cook Time: 30-35 minutes
- Total Time: 0 hours
Ingredients
– 3 cups all-purpose flour
– 1 ½ cups warm water (about 110°F/43°C)
– 1 teaspoon salt
– 1 teaspoon instant yeast
– 2 tablespoons fresh rosemary, chopped (or 2 teaspoons dried)
– Cornmeal or additional flour for dusting
Instructions
Making No Knead Rosemary Bread is a straightforward process. Follow these steps to achieve your aromatic masterpiece:
1. Combine Dry Ingredients: In a large mixing bowl, whisk together the flour, salt, yeast, and chopped rosemary until evenly mixed.
2. Add Water: Gradually pour in the warm water while stirring with a wooden spoon or spatula until a shaggy dough forms.
3. Mix Thoroughly: Ensure that all flour is incorporated into the mixture. The dough should be wet and sticky.
4. Cover the Bowl: Loosely cover the bowl with plastic wrap or a clean kitchen towel and let it rest for 12 to 18 hours at room temperature. Overnight is best.
5. Preheat the Oven: About 30 minutes before you plan to bake, preheat your oven to 450°F (230°C). Place a Dutch oven (with the lid) inside to heat up as well.
6. Shape the Dough: When your dough is ready, turn it out onto a well-floured surface. With floured hands, gently shape it into a round loaf without kneading, and let it rest on a floured surface for about 30 minutes.
7. Prepare for Baking: Carefully remove the preheated Dutch oven from the oven and sprinkle the bottom with cornmeal or additional flour to prevent sticking.
8. Transfer the Dough: Place the dough into the hot pot (it’s okay if it’s not perfectly shaped) and cover with the lid.
9. Bake: Bake covered for 30 minutes, then remove the lid and bake for an additional 10-15 minutes or until the crust is golden brown.
10. Cool: Carefully remove the bread from the pot and let it cool on a wire rack for at least 30 minutes before slicing.
Enjoy the amazing aroma wafting through your kitchen as your bread cools!
Nutrition
- Serving Size: 8 slices
- Calories: 150 kcal per slice
- Fat: 1g per slice
- Protein: 4g per slice