

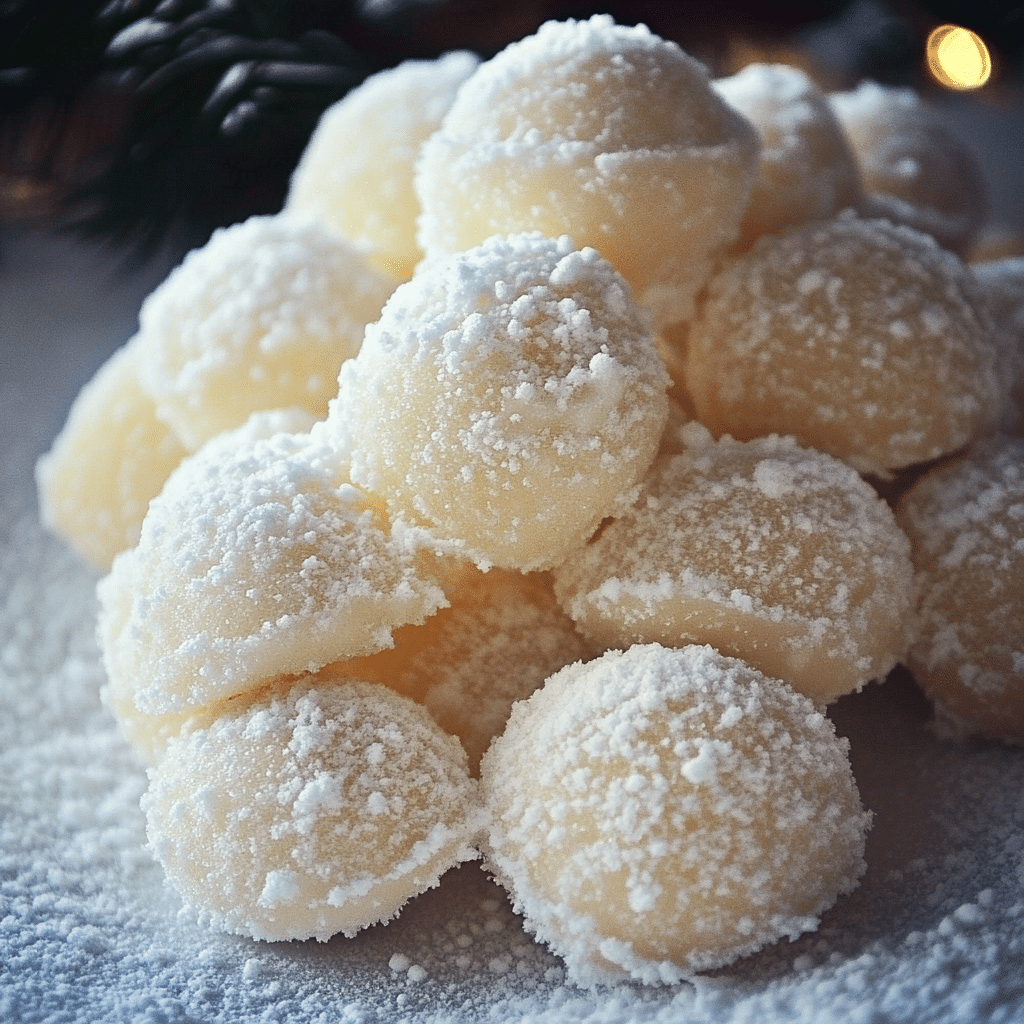
Sweetened Condensed Milk Snowballs are the perfect bite-sized treats for when you want something sweet, soft, and irresistibly creamy. These delightful no-bake confections are made with a luscious mixture of sweetened condensed milk and shredded coconut, rolled into little balls of happiness, and coated with a snowy layer of extra coconut. The result? A melt-in-your-mouth experience with just the right amount of chewiness and a burst of tropical flavor.
I first made these snowballs during the holiday season when I was looking for a quick and easy treat that still felt festive. With just a few simple ingredients, they came together effortlessly, and their adorable snowy appearance made them an instant hit. What I love most about these snowballs is their versatility—you can add a hint of vanilla or almond extract, roll them in chopped nuts or cocoa powder, or even drizzle them with chocolate for an extra layer of indulgence. They’re the ultimate no-fuss dessert that’s perfect for parties, gifts, or just a cozy night at home.
Perfect for:
- Holiday parties
- Gifting
- Potlucks
- Quick desserts
- Coconut lovers
Why You’ll Love This Recipe
Here are 10 reasons why these Sweetened Condensed Milk Snowballs will become a household favorite:
- Simple Ingredients: Made with pantry staples, these are easy to whip up anytime.
- No Baking Required: Perfect for when you want a quick and fuss-free treat.
- Creamy and Rich: The sweetened condensed milk filling is luscious and indulgent.
- Coconut Coating: Adds a touch of tropical flavor and a light crunch.
- Customizable Add-Ins: You can easily add nuts, chocolate chips, or dried fruits to make them your own.
- Kid-Friendly Recipe: Fun and easy for children to help make.
- Great for Gifting: These snowballs look elegant and make thoughtful edible gifts.
- Freezer-Friendly: Can be made ahead and stored in the freezer for up to a month.
- Crowd-Pleaser: Loved by kids and adults alike at gatherings.
- Perfect Portion Size: Each bite-sized piece is just the right amount of indulgence.
Preparation and Cooking Time
- Total Time: 20 minutes
- Preparation Time: 15 minutes
- Chilling Time: 5 minutes
- Servings: 20-25 snowballs
- Calories per serving: Approximately 90-100 calories
- Key Nutrients: Protein: 1g, Carbs: 14g, Fat: 3g
Ingredients
For the Snowballs:
- 1 can (14 oz) sweetened condensed milk
- 1 teaspoon vanilla extract
- 2 cups desiccated coconut (plus extra for rolling)
- ½ cup finely chopped nuts (optional, e.g., almonds or pecans)
- ¼ cup powdered sugar
Optional Garnish:
- Sprinkles
- Cocoa powder
- Finely grated chocolate
Ingredient Highlights
- Sweetened Condensed Milk: Provides a rich, creamy sweetness to bind the ingredients.
- Desiccated Coconut: The key to the classic “snowball” texture and flavor.
- Vanilla Extract: Adds a subtle depth of flavor to the mixture.
Step-by-Step Instructions
Make the Base Mixture:
- Combine Ingredients: In a large bowl, mix together sweetened condensed milk, vanilla extract, desiccated coconut, and powdered sugar until well combined. If using nuts, fold them in at this stage.
- Adjust Consistency: If the mixture feels too sticky, add more coconut a tablespoon at a time until it’s firm enough to roll into balls.
Shape and Coat:
- Roll into Balls: Scoop small portions of the mixture and roll them into 1-inch balls between your palms.
- Coat in Coconut: Roll each ball in additional desiccated coconut until fully coated.
Chill and Serve:
- Chill: Place the snowballs on a tray lined with parchment paper and chill in the refrigerator for at least 5 minutes to set.
Serve:
- Present and Enjoy: Arrange on a platter or package them in decorative boxes for gifting.
How to Serve
Here are 10 serving ideas for Sweetened Condensed Milk Snowballs:
- On a Dessert Platter: Pair with cookies and chocolates for variety.
- Holiday Treat: Arrange on a festive tray with other seasonal desserts.
- With Coffee or Tea: A perfect accompaniment to your favorite hot beverage.
- For a Party: Serve in mini cupcake liners for an elegant presentation.
- As Edible Gifts: Package in cellophane bags with ribbons for gifting.
- With Fresh Fruit: Serve alongside berries or tropical fruit slices for contrast.
- Topped with Sprinkles: Add colorful sprinkles for a playful touch.
- As a Wedding Favor: Present in elegant gift boxes for a personal touch.
- In Lunchboxes: A sweet surprise for kids’ lunchboxes.
- Frozen Treats: Serve chilled for a refreshing snack on warm days.
Additional Tips
- Chill the Dough: Before rolling the mixture into balls, refrigerate the dough for 20–30 minutes. This helps firm it up and makes shaping easier.
- Coat Thoroughly: Use a shallow dish for your coconut or powdered sugar coating and gently roll each ball to ensure even coverage.
- Use a Cookie Scoop: For uniform sizes, use a small cookie scoop to portion out the dough before rolling it into balls.
- Toast the Coconut: If you prefer a nuttier flavor, lightly toast the shredded coconut before using it as a coating.
- Add Flavor Extracts: Enhance the flavor with a few drops of vanilla, almond, or even coconut extract.
- Incorporate Add-Ins: Mix in chopped nuts, mini chocolate chips, or dried fruit for added texture and flavor.
- Work Quickly: If the dough softens as you work, return it to the refrigerator to firm up again before continuing.
- Use Non-Stick Hands: Lightly grease your hands with butter or oil to prevent the sticky dough from clinging while shaping.
- Store Properly: Place the finished snowballs in an airtight container and refrigerate them to maintain freshness. Separate layers with parchment paper to prevent sticking.
- Presentation Matters: For gifting or parties, place each snowball in a decorative mini cupcake liner. It adds a festive touch and makes them easier to handle.
Recipe Variations
- Chocolate-Coated Snowballs: Dip the balls in melted chocolate for a decadent twist.
- Coconut-Free Version: Use finely crushed graham crackers or cookies as the base instead.
- Zesty Snowballs: Add lemon or orange zest for a citrusy flavor.
- Nut-Free Option: Skip the nuts and add mini chocolate chips or raisins.
- Spiced Snowballs: Mix in a pinch of cinnamon or nutmeg for a warm, spiced flavor.
- Protein Boost: Add a scoop of protein powder to the mixture for a nutritious snack.
- Alcohol-Infused: Add a splash of rum or liqueur for an adults-only version.
- Matcha Snowballs: Mix in a teaspoon of matcha powder for an earthy twist.
- Colorful Snowballs: Add a drop of food coloring to the base for festive-themed treats.
- Layered Snowballs: Press a small piece of chocolate or nut into the center of each ball for a surprise filling.
Special Equipment
- Mixing Bowls – For combining the ingredients.
- Hand Mixer or Stand Mixer – To ensure the mixture is smooth and well-combined.
- Measuring Cups and Spoons – For precise ingredient measurements.
- Rubber Spatula – For scraping down the sides of the bowl.
- Small Ice Cream Scoop or Cookie Scoop – To form evenly sized snowballs.
- Baking Tray or Sheet Pan – To place the snowballs for chilling.
- Parchment Paper or Silicone Baking Mat – To prevent sticking during preparation.
- Cooling Rack – If you plan to drizzle chocolate or coatings over the snowballs.
- Shallow Bowl for Coatings – For rolling the snowballs in toppings like shredded coconut.
- Airtight Container – To store the snowballs after preparation, keeping them fresh.
FAQ Section
1. What are Sweetened Condensed Milk Snowballs?
Sweetened Condensed Milk Snowballs are no-bake or baked treats made with a rich and creamy mixture of sweetened condensed milk, coconut, and other ingredients, shaped into balls and often coated with shredded coconut or powdered sugar.
2. Can I use any brand of sweetened condensed milk?
Yes, most brands of sweetened condensed milk will work, but using a high-quality brand ensures better flavor and consistency.
3. Are Sweetened Condensed Milk Snowballs gluten-free?
They can be made gluten-free if you use gluten-free ingredients, such as certified gluten-free oats or cookies for variations.
4. How do I store Sweetened Condensed Milk Snowballs?
Store them in an airtight container in the refrigerator for up to 7-10 days. They can also be frozen for longer storage.
5. Can I freeze Sweetened Condensed Milk Snowballs?
Yes, they freeze well. Place them in a freezer-safe container or bag, separating layers with parchment paper. Thaw in the refrigerator before serving.
6. Can I substitute coconut if I don’t like it?
Yes, you can substitute finely chopped nuts, ground oats, or even powdered sugar for the coconut coating.
7. Do I need to bake Sweetened Condensed Milk Snowballs?
No, they are typically a no-bake dessert, but some recipes may include a quick bake for added texture.
8. How long does it take to prepare Sweetened Condensed Milk Snowballs?
Preparation usually takes 20-30 minutes, plus additional time for chilling if required.
9. Can I make them vegan?
Yes, you can use a plant-based sweetened condensed milk and other vegan-friendly ingredients like non-dairy chocolate or coconut.
10. Can I add flavors to the mixture?
Absolutely! You can add vanilla extract, almond extract, citrus zest, or spices like cinnamon for added flavor.
Conclusion
Sweetened Condensed Milk Snowballs are a delightful, no-bake treat that’s perfect for the holiday season or any time you crave something sweet and easy to make. These little confections are made with sweetened condensed milk, shredded coconut, and a touch of vanilla, creating soft, chewy centers with a snowy coating of coconut or powdered sugar.
These snowballs are versatile and can be customized by adding ingredients like chopped nuts, dried fruit, or even a hint of lemon zest for extra flavor. Their snowy appearance makes them a festive addition to holiday dessert spreads or an adorable homemade gift.
I can’t wait to see how your Sweetened Condensed Milk Snowballs turn out! Be sure to share your photos on Instagram and tag me—I’d love to see your snowy, sweet creations. Don’t forget to leave a comment and let me know how you made these treats uniquely yours!