

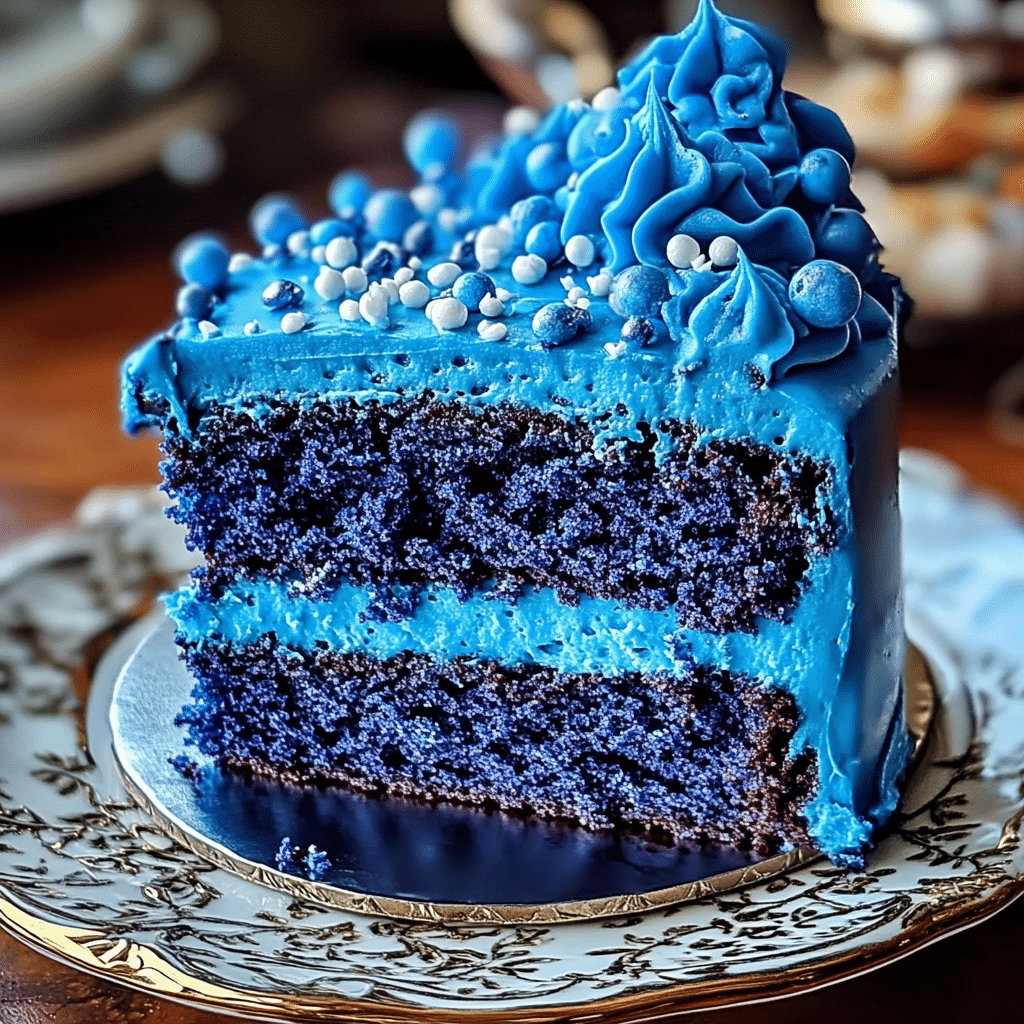
Divine Blue Velvet Cake is an elegant and indulgent twist on the classic red velvet cake, featuring a stunning blue color that’s as eye-catching as it is delicious. This cake is made with a rich and moist crumb, thanks to the buttermilk and a dash of cocoa powder. It’s complemented by a tangy cream cheese frosting that balances the sweetness, making each bite melt in your mouth. The bright blue hue, created using natural blue food coloring or butterfly pea powder, adds a fun and striking visual element, making it a perfect centerpiece for any special occasion.
I first made Divine Blue Velvet Cake when I was looking for something a little different but equally indulgent as the red velvet cake. The blue color offers a playful and fresh take on a beloved classic, and the flavor profile—slightly chocolatey, moist, and rich—is just as satisfying. The cream cheese frosting brings a perfect tanginess that complements the sweetness of the cake, and it’s easy to decorate with sprinkles, edible flowers, or a drizzle of chocolate ganache for an extra touch of elegance.
What I love most about this cake is how it stands out at any event. Whether it’s for a birthday, wedding, or baby shower, the vibrant blue color makes it a showstopper. You can customize the frosting by adding hints of vanilla or almond extract for more depth of flavor, or even add a touch of lemon zest to brighten it up. Divine Blue Velvet Cake is a delicious, visually stunning dessert that’s sure to leave an impression on anyone who tries it.
Perfect for:
- Celebratory events
- Birthdays
- Baby showers
- Weddings
- Lovers of unique desserts
Why You’ll Love This Recipe
Here are 10 reasons why this Divine Blue Velvet Cake will win your heart:
- Unique Color: A vibrant blue shade that makes this cake stand out at any gathering.
- Classic Velvet Texture: Soft, moist, and perfectly dense with every bite.
- Tangy Cream Cheese Frosting: The ultimate pairing for the sweet, mild cocoa flavor of the cake.
- Show-Stopping Presentation: Perfectly layered and visually stunning for special occasions.
- Easy to Customize: Add edible pearls, sprinkles, or decorations for a personalized touch.
- Crowd Pleaser: A dessert everyone will admire and love.
- Velvety Richness: Achieves the signature velvety crumb with buttermilk and a hint of cocoa.
- Great for Any Occasion: Perfect for holidays, parties, or just a weekend indulgence.
- Versatile Recipe: Adaptable to cupcakes or mini cakes for individual servings.
- Memorable Dessert: A unique twist on a classic recipe that’s sure to leave an impression.
Preparation and Cooking Time
- Total Time: 2 hours (including cooling time)
- Preparation Time: 40 minutes
- Cooking Time: 25-30 minutes
- Cooling Time: 50 minutes
- Servings: 12-14 servings
- Calories per serving: Approximately 450-500 calories
- Key Nutrients: Protein: 6g, Carbs: 55g, Fat: 23g
Ingredients
For the Cake:
- 2½ cups all-purpose flour
- 1½ cups granulated sugar
- 1 teaspoon baking powder
- 1 teaspoon baking soda
- 1 teaspoon salt
- 1 tablespoon unsweetened cocoa powder
- 1 cup buttermilk
- ½ cup vegetable oil
- 2 large eggs
- 1 teaspoon vanilla extract
- 1 teaspoon white vinegar
- 1-2 teaspoons blue gel food coloring
For the Cream Cheese Frosting:
- 8 oz cream cheese, softened
- ½ cup unsalted butter, softened
- 4 cups powdered sugar
- 2 teaspoons vanilla extract
- Pinch of salt
Optional Garnish:
- Edible pearls or silver sprinkles
- White chocolate shavings
Ingredient Highlights
- Buttermilk: Essential for achieving the classic velvet texture and tangy flavor.
- Blue Gel Food Coloring: Produces a vibrant, consistent color without thinning the batter.
- Cream Cheese: Adds richness and tang to the frosting, balancing the cake’s sweetness.
Step-by-Step Instructions
Make the Cake:
- Preheat Oven: Preheat your oven to 350°F (175°C). Grease and line three 8-inch round cake pans with parchment paper.
- Combine Dry Ingredients: In a large bowl, whisk together flour, sugar, baking powder, baking soda, salt, and cocoa powder.
- Mix Wet Ingredients: In another bowl, whisk buttermilk, oil, eggs, vanilla extract, vinegar, and blue food coloring until well combined.
- Combine Wet and Dry: Gradually mix the wet ingredients into the dry ingredients until a smooth batter forms.
- Divide Batter: Divide the batter evenly among the prepared pans.
- Bake: Bake for 25-30 minutes or until a toothpick inserted into the center comes out clean.
- Cool Cakes: Let the cakes cool in their pans for 10 minutes, then transfer to wire racks to cool completely.
Make the Frosting:
- Beat Cream Cheese and Butter: In a large bowl, beat the cream cheese and butter together until creamy and smooth.
- Add Powdered Sugar: Gradually mix in the powdered sugar until fully incorporated.
- Flavor and Finish: Add vanilla extract and a pinch of salt, beating until the frosting is fluffy and spreadable.
Assemble the Cake:
- Level Layers: Trim the tops of the cakes if necessary to create even layers.
- Frost the Cake: Place one cake layer on a serving plate, spread frosting evenly on top, and repeat with the remaining layers.
- Decorate: Frost the outside of the cake and decorate with your choice of garnish.
Serve:
- Slice and Enjoy: Serve the cake chilled or at room temperature for a delightful treat.
How to Serve
Here are 10 serving suggestions for Divine Blue Velvet Cake:
- As a Celebration Centerpiece: Impress guests at birthdays or anniversaries.
- With Fresh Berries: Add a pop of flavor and color with fresh blueberries or strawberries.
- At Baby Showers: A perfect fit for a blue-themed celebration.
- With Whipped Cream: Pair with a dollop of fresh whipped cream for extra indulgence.
- As Wedding Cake: A unique choice for weddings or engagement parties.
- With Ice Cream: Serve alongside vanilla or coconut ice cream.
- For Afternoon Tea: Enjoy smaller slices with a cup of tea.
- As Cupcakes: Transform the recipe into individual portions for convenience.
- With Edible Glitter: Add a touch of sparkle for festive occasions.
- For Gift Giving: Share as a homemade gift for loved ones.
Additional Tips
- Use Gel Food Coloring: For a vibrant blue without affecting the batter consistency.
- Chill Frosting: If the frosting becomes too soft, chill it for 15 minutes before spreading.
- Level Cake Layers: Use a serrated knife or cake leveler for a polished look.
- Avoid Overmixing: Mix the batter just until the ingredients are combined to prevent a dense cake.
- Store Properly: Refrigerate leftovers in an airtight container for up to 5 days.
Recipe Variations
- Red Velvet Twist: Use red food coloring for a traditional red velvet cake.
- Marbled Velvet Cake: Swirl blue and white batters together for a marbled effect.
- Lemon Blue Velvet Cake: Add lemon zest to the batter for a citrusy flavor.
- Blue Velvet Cupcakes: Bake as cupcakes and top with piped frosting.
- Ombre Cake: Use varying shades of blue in each layer for a gradient effect.
- Vegan Option: Substitute dairy and eggs with plant-based alternatives.
- Nutty Crunch: Add chopped pecans or walnuts between the layers for texture.
- Chocolate Ganache Drip: Drizzle chocolate ganache over the frosted cake for added elegance.
- Berry Infusion: Add a layer of blueberry compote between the cake layers.
- Holiday Edition: Incorporate edible snowflakes for a winter-themed cake.
Special Equipment
- Round Cake Pans: For perfectly shaped layers.
- Parchment Paper: To prevent sticking and ensure easy removal.
- Electric Mixer: For smooth batter and frosting.
- Cake Leveler: To trim and even out layers.
- Offset Spatula: For easy frosting application.
- Decorating Tools: Piping bags or tips for a professional finish.
FAQ Section
- Can I make this cake ahead of time?
Yes, you can prepare and frost the cake a day in advance. Store in the refrigerator. - What’s the best food coloring to use?
Gel food coloring is recommended for vibrant results without altering the batter’s texture. - Can I use a different frosting?
Absolutely! Swiss meringue or buttercream frosting work wonderfully too. - How do I prevent crumbs in the frosting?
Apply a crumb coat before the final layer of frosting for a smooth finish. - Can I make this cake gluten-free?
Yes, substitute the flour with a gluten-free blend for similar results. - What if I don’t have buttermilk?
Use 1 cup of milk with 1 tablespoon of lemon juice or vinegar as a substitute. - How do I ensure vibrant blue color?
Use high-quality gel food coloring and adjust the amount as needed. - Can I freeze the cake?
Yes, wrap the unfrosted layers in plastic wrap and freeze for up to 2 months. - What’s the best way to cut the cake cleanly?
Use a sharp knife dipped in hot water and wiped clean between slices. - How can I make this cake extra moist?
Add an extra tablespoon of oil or a dollop of sour cream to the batter.
Conclusion
This Divine Blue Velvet Cake is an indulgent and visually stunning dessert that takes the classic red velvet cake to a whole new level. With its vibrant blue hue and soft, moist crumb, it’s a showstopper for any occasion, whether it’s a birthday, celebration, or a sweet treat to wow your guests.
The magic of this recipe lies in the delicate balance of flavors—this cake is rich, buttery, and slightly tangy from the buttermilk, with just a hint of cocoa powder to round it out. The striking blue color is achieved using food coloring or naturally derived blue ingredients, such as butterfly pea powder. The cream cheese frosting is the perfect complement, adding a smooth, tangy richness that pairs beautifully with the sweet cake.
I’d love to see your Divine Blue Velvet Cake creations! Share your photos on Instagram and tag me—I can’t wait to see your breathtaking cakes. Don’t forget to leave a comment and share any fun twists or decorative touches that made your cake uniquely yours!