
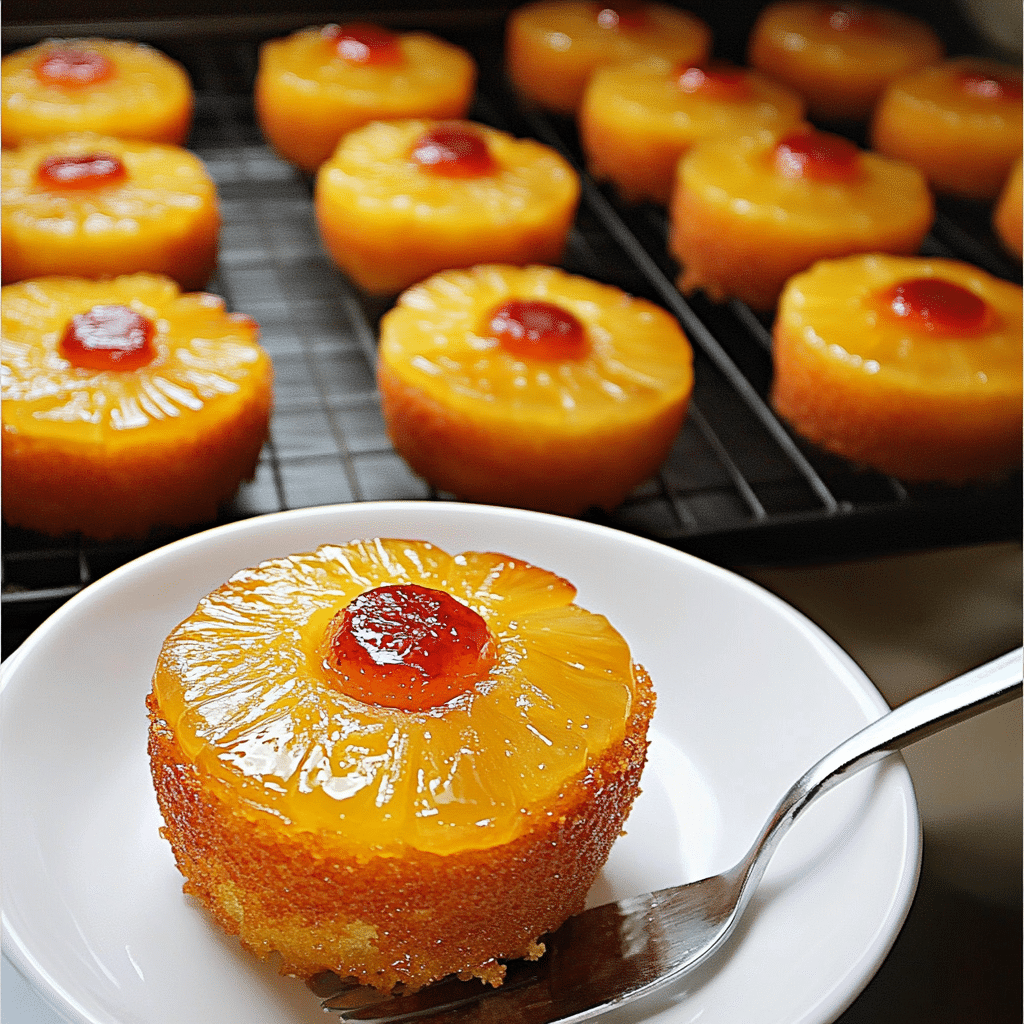
Mini Pineapple Upside Down Cakes are a delightful twist on the classic dessert, offering individual portions of the beloved caramelized pineapple, buttery cake, and maraschino cherry topping. These mini cakes are moist, flavorful, and perfectly sized for single servings, making them perfect for parties, gatherings, or special occasions. The sweet, tangy pineapple pairs beautifully with the soft cake, while the caramelized edges add a delightful depth of flavor.
I first made these Mini Pineapple Upside Down Cakes for a family celebration, and they quickly became a favorite! The process is simple yet fun—start by placing the pineapple rings and cherries in the bottom of each cake pan, then pour the cake batter on top and bake. Once they’re flipped, the result is a perfectly golden, caramelized treat that’s as beautiful as it is delicious. These cakes are easy to serve, and you can even customize them with a drizzle of extra caramel or a scoop of vanilla ice cream for a special touch.
Perfect for:
- Dessert buffets
- Birthday parties
- BBQs or summer gatherings
- Quick and easy dessert for guests
- A fun spin on a classic
Why You’ll Love This Recipe
- Single-Serving Delight: The mini size makes them easy to serve and eat without any mess.
- Sweet and Tangy Flavor: The caramelized pineapple adds a tangy-sweet element that pairs perfectly with the soft, fluffy cake.
- Classic Dessert with a Twist: Enjoy all the flavors of traditional pineapple upside-down cake, but in a more convenient mini version.
- Perfect Balance of Moistness and Crunch: The buttery pineapple topping adds a delicious crunch, while the cake remains soft and moist.
- Make-Ahead Friendly: These cakes can be made ahead of time and stored until you’re ready to serve.
- Visually Appealing: They have an eye-catching presentation with a caramelized top, making them a standout on any dessert table.
- Great for Beginners: Simple to make with basic ingredients, yet they look impressive!
- Customizable: You can easily swap out pineapple for other fruits like peaches or cherries for a variation.
- No-Fuss Cleanup: With their mini size, cleanup is a breeze compared to a full-sized cake.
- Kid-Friendly: The sweet, fruity flavor and cute size make these a favorite for children.
Preparation and Cooking Time
- Total Time: 1 hour 15 minutes
- Preparation Time: 20 minutes
- Cooking Time: 30-35 minutes
- Servings: 12 mini cakes
- Calories per serving: Approximately 220-250 calories
Ingredients
For the Pineapple Topping:
- 1 can (20 oz) pineapple slices, drained
- ½ cup (1 stick) unsalted butter, melted
- ¾ cup brown sugar (packed)
- 12 maraschino cherries (optional, for garnish)
For the Cake Batter:
- 1 ½ cups all-purpose flour
- 1 ½ teaspoons baking powder
- ¼ teaspoon salt
- ½ cup unsalted butter, softened
- ¾ cup granulated sugar
- 2 large eggs
- 1 teaspoon vanilla extract
- ½ cup whole milk
Step-by-Step Instructions
Prepare the Pineapple Topping:
- Preheat Oven: Preheat your oven to 350°F (175°C).
- Prepare Muffin Tin: Grease and lightly flour a 12-cup muffin tin or line with paper liners.
- Arrange Pineapple Slices: In each muffin cup, place one pineapple slice at the bottom. You may need to cut them to fit.
- Make Caramelized Syrup: In a small bowl, mix the melted butter and brown sugar until combined. Spoon a generous tablespoon of this mixture over each pineapple slice in the muffin tin.
- Add Maraschino Cherry (Optional): Place a maraschino cherry in the center of each pineapple ring for a pop of color and added sweetness.
Make the Cake Batter:
- Mix Dry Ingredients: In a medium bowl, whisk together the flour, baking powder, and salt. Set aside.
- Cream Butter and Sugar: In a large bowl, beat the softened butter and granulated sugar together until light and fluffy (about 2-3 minutes).
- Add Eggs and Vanilla: Add the eggs one at a time, beating well after each addition. Stir in the vanilla extract.
- Alternate Adding Dry Ingredients and Milk: Gradually add the dry ingredients to the wet ingredients in batches, alternating with the milk, beginning and ending with the dry ingredients. Mix until just combined, being careful not to overmix.
Assemble and Bake:
- Spoon Batter Over Pineapple: Spoon the cake batter evenly over the pineapple slices in each muffin cup, filling each cup about ¾ full.
- Bake: Bake for 30-35 minutes or until a toothpick inserted into the center comes out clean. The tops should be golden brown and slightly spring back when touched.
- Cool in Pan: Let the mini cakes cool in the pan for about 10 minutes.
Invert and Serve:
- Invert the Cakes: Carefully run a knife around the edges of each muffin cup to loosen the cakes. Place a wire rack or a plate over the muffin tin and gently flip the pan upside down to release the cakes.
- Cool Completely: Allow the cakes to cool completely, then serve.
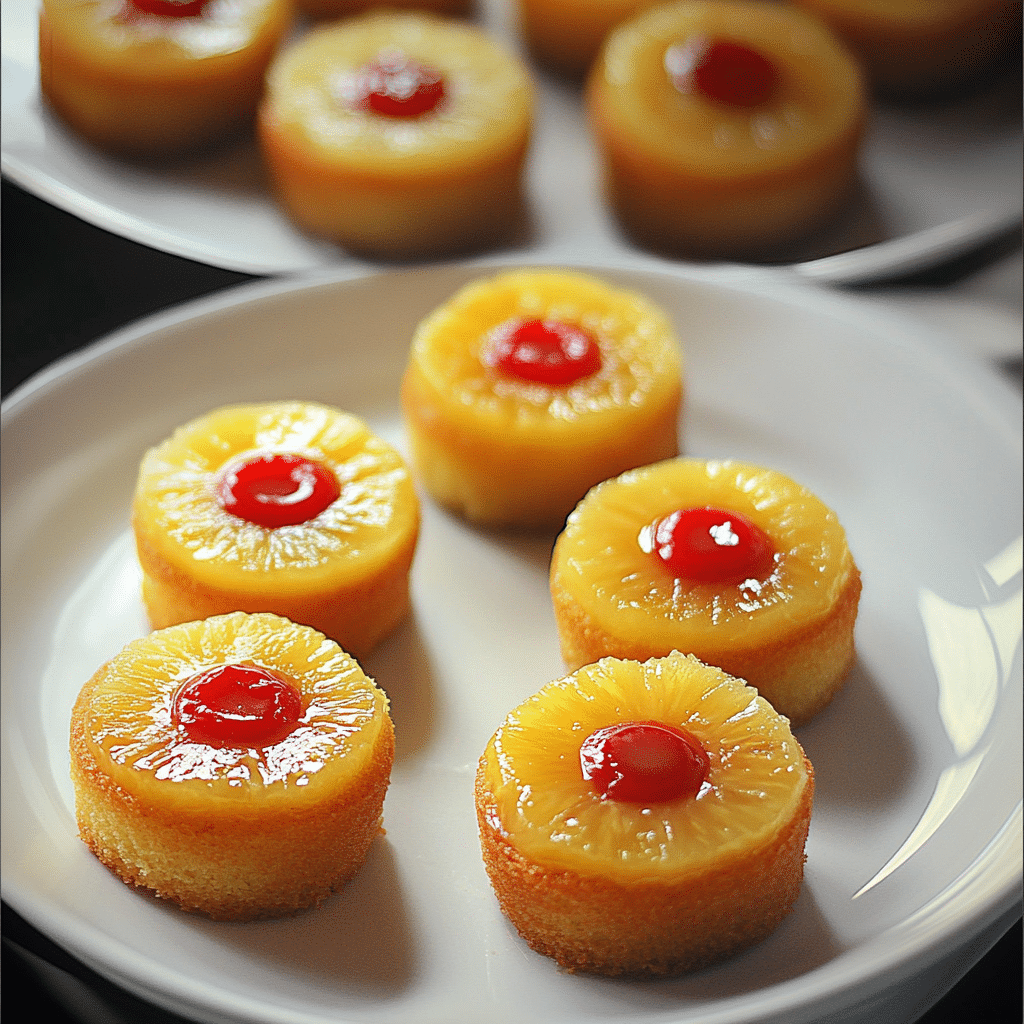
How to Serve
- Serve warm or at room temperature.
- Garnish with whipped cream or a drizzle of caramel sauce for extra sweetness.
- Pair with a scoop of vanilla ice cream for a more indulgent treat.
Additional Tips
- Use Fresh Pineapple: For a vibrant and natural sweetness, swap canned pineapple rings with fresh pineapple slices.
- Opt for Silicone Molds: Silicone muffin pans make it easier to pop out the cakes without sticking or breaking.
- Perfectly Sized Rings: Use a small round cookie cutter to trim pineapple rings to fit your muffin pan wells.
- Brown Sugar Mixture First: Ensure the brown sugar and butter mixture is evenly spread at the bottom of each mold for a consistent caramel topping.
- Room Temperature Ingredients: Use room-temperature butter and eggs for a smoother batter that bakes evenly.
- Cherry Alternatives: Replace maraschino cherries with fresh raspberries or candied ginger for a unique twist.
- Prevent Overflow: Fill muffin wells no more than 2/3 full to avoid batter spilling over during baking.
- Cooling Time is Key: Let the cakes cool for 5–10 minutes before inverting them to ensure the topping sticks properly.
- Add a Spice Kick: Enhance the flavor with a pinch of cinnamon or nutmeg in the batter for a warm, aromatic touch.
- Serve with a Dollop: Pair the cakes with whipped cream or vanilla ice cream for an extra layer of indulgence.
Recipe Variations
- Cherry Pineapple Upside-Down Cakes: Add a maraschino cherry to each cup for a burst of color and sweetness.
- Tropical Pineapple Mango Upside-Down Cakes: Replace the pineapple slices with mango slices for a tropical twist.
- Coconut Pineapple Upside-Down Cakes: Add shredded coconut to the cake batter for added flavor and texture.
- Spiced Pineapple Upside-Down Cakes: Add a pinch of cinnamon and nutmeg to the cake batter for a warm, spiced flavor.
FAQ Section
- What are Mini Pineapple Upside Down Cakes?
Mini Pineapple Upside Down Cakes are individual-sized versions of the classic pineapple upside-down cake, featuring a caramelized pineapple topping on a moist, fluffy cake base. - Can I use fresh pineapple for these cakes?
Yes! You can use fresh pineapple instead of canned pineapple. Just be sure to cut it into small, evenly-sized pieces to ensure it cooks well and fits in the pan. - Can I make Mini Pineapple Upside Down Cakes ahead of time?
Absolutely! These cakes can be baked ahead of time and stored in an airtight container for 2-3 days. You can also freeze them for up to 2 months, then reheat before serving. - Do I need special equipment to make Mini Pineapple Upside Down Cakes?
A muffin tin or mini cake pan works best for making these individual cakes. - What can I substitute for the maraschino cherries?
If you prefer not to use maraschino cherries, you can substitute them with fresh or dried cherries, or even berries like raspberries or strawberries. - Can I make the cake gluten-free?
Yes! You can easily make a gluten-free version by substituting regular flour with a gluten-free all-purpose flour blend. - Can I make the topping without butter?
Yes, you can substitute the butter with margarine or coconut oil for a dairy-free version of the cake. This will still give you a caramelized effect. - How do I remove the cakes from the pan without ruining them?
Let the cakes cool in the pan for 10-15 minutes before carefully running a knife around the edges. - Can I add other fruits to the topping?
You can experiment with different fruits such as peaches, apricots, or berries.
Store any leftover cakes in an airtight container at room temperature for up to 3 days.
Conclusion
Apple Crisp Mini Cheesecakes are a delightful fusion of two beloved desserts: creamy cheesecake and warm, spiced apple crisp. These mini cheesecakes feature a buttery, crumbly oat topping that mimics the texture of a classic apple crisp, paired with a rich and velvety cheesecake filling. The apple topping is made with cinnamon-spiced apples, adding a perfect balance of sweet and tart flavors.
These bite-sized cheesecakes are perfect for any fall gathering or holiday dessert table, offering a little taste of autumn in each bite. They’re easy to make, and the combination of textures—creamy cheesecake, crisp apples, and a crunchy topping—will have everyone reaching for seconds.
I can’t wait to see how your Apple Crisp Mini Cheesecakes turn out! Be sure to share your photos on Instagram and tag me—I’d love to see your beautiful creations. Don’t forget to leave a comment and let me know how you added your own special touch!